I hadn't used chalk paint but had found it hard not to be a little intrigued about what all the fuss is about- you can't look on Pinterest without something being painted with the stuff! So I thought I would give it a whirl. I have written this blog to share some of the things I have found about chalk paint since that first project. I suggest you give it a try- it is a bit addictive and you tend to paint anything that isn't nailed down but it is a great way to give new life to something shabby or destined for the tip.
There are a few options on the market for chalk paint. The paint from Newton's Paints is really well priced and comes in little tins if you are a bit scared of investing too much to begin with. It is also available to buy online. There is the Annie Sloan products which are also good and available in loads of places, but I like to buy NZ made. Check out newton's online store HERE .
I thought that the 'no sanding' bit sounded like me and so on a sunny afternoon I cracked into it.
I rescued this little sidetable from the burn pile (the farmer tried three times to put it back on there!) and created this funky little striped table!
 |
| The ugly table that I started my chalk paint journey with. |
Ok so here are some things I have learnt about chalk paint since this first table project:
- THE BRUSHES: you don't need the fancy brushes that cost the earth, but a good quality brush will make the job have a nicer finish- talk to your hardware store about what is a good option- make sure you tell them you are working with chalk paint. I used the brushes from Newton's paint which start at $12.50 NZD, I have used a sponge for a small picture frame which gave a different effect again. or you could use a roller if you want a really smooth finish on a tabletop or something.
- THE WAX: Get a brush for the wax, a piece of cloth will work but a brush is so much easier and gets into all the little corners. This also helps not using it all at once. The first time I did it, I used about half a bottle (of the liquid wax) on this little table and that was not necessary- in this case less is more. Also I found that the waxing step isn't as scary as I thought it was- it is actually quite easy and fast. I used two coats of wax on my table because I thought the top might last a bit better, I waited 24 hours between coats and it is really hard.
- DARK WAX TIP: Have a damp cloth near by when applying dark wax. Applying dark wax can be very scary and intimidating at first. Every time I begin to apply it to an already beautiful chalk painted piece of furniture I hesitate. Here is a bonus tip: you always want to apply dark wax right after you have applied your clear wax. It makes it go on more smooth and is easier to spread around. Don’t worry, you are not going to ruin your masterpiece with this intimidating darkness that you think will never come off. If you want, (here is another bonus tip) take a paper plate and plastic spoon and mix a little clear wax with your dark wax. This will give your antiquing vintage look that you are trying to achieve a soft finish. I like to have a clean damp cotton rag (old white t shirt) near by when doing a dark wax application just so I can spread it around easier or I can completely wipe off areas I'm not totally stoked about, I have done that a few times!
- BUFFING: Put your back into it! Also wait till tomorrow before you attack it, you get a better shine when the wax has had enough time to set. I used cheesecloth and it works really well. there are brushes available but I haven't tries so i cannot comment on their finish.
- MIX THE PAINT: Make sure it is mixed properly. I sat my tin upside down for a bit and then gave it a bloody good shake. That seemed to do the trick.
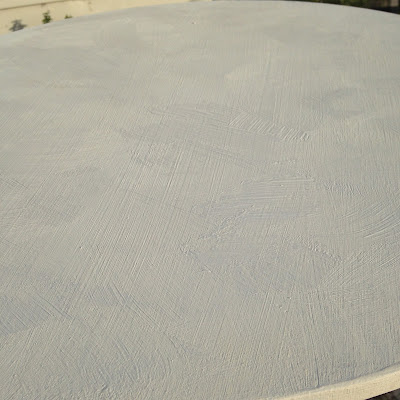
- THE FIRST COAT: I looked at my first coat and thought that I had been spun a yarn about how good this stuff is- it looked awful. However that coat dried in under and hour and I put the next coat on- then we were looking pretty sharp. The first coat was really rough and quite patchy with lots of brush marks. Once I put the second coat on, it smoothed out heaps and I wanted the brush texture so I applied it in all different directions to get a textured finish, you could be careful with your strokes following to grain to get a smoother look or apply it with a roller for a really even finish. But please do not panic at what it looks like in the beginning- more coats brings your project to life.
 |
| You can see the brush strokes in the paint, which is what I was after but you could follow the grain with a brush or apply with a roller to get a smooth finish. This is after the second coat. |
- LAYERS: layers work really well, if you want that chipped through vintage look of many years of painted layers then just paint multiple layers and chip each one as you go. Or just take some rough sandpaper and take some areas of paint off to make it look worn through to the next layer. There are some really good tutorials online for that and then wax it at the end. Or if you want stripes or patterns then just wait for the layer to dry, mask it up and paint straight over it. Then wax it to finish it. I used house paint for the stripes on this because I wanted to use the same colour I had on something else. You can create this with multiple layers of chalk paint though and there are heaps of colours available.
- TO DISTRESS OR NOT TO DISTRESS: With this little table I didn't because I quite liked it the way it was but I have on projects since. This is quite easy and you can do it before or after the wax step- just on the google machine and find some projects that others have done to get some ideas about how distressed you want something to look. I found the thread on screws, steel wool and coarse sandpaper are the best (it sort of depends if you care about damaging the wood underneath as to how rough you want to be- sand paper is going to just damage the paint). I suggest buying something cheap or rescuing something that is being thrown out to have a practice on.
Have fun!
xx Abby


